


The Instant Pot is an incredible kitchen gadget that allows you to streamline the yogurt-making process. However its instructions are designed for direct-set yogurt, so make sure to follow the extra steps required to perpetuate your heirloom Greek orBulgarian yogurt starter!
15 minutes
120 minutes
4
INGREDIENTS AND EQUIPMENT AVAILABLE AT CULTURES FOR HEALTH
Greek Yogurt Starter Culture
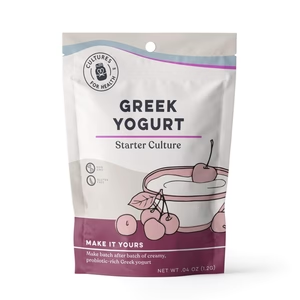
Greek Yogurt Starter Culture
$14.99
There’s a reason Greek Yogurt is one of our most popular products! Make tangy, rich, and delicious yogurt at home for a fraction of the cost of store-bought.
Using a starter culture allows you to control the ingredients, making your Greek Yogurt much healthier.
The Greek Yogurt Starter is an heirloom culture - meaning you'll make endless delicious yogurt all from one starter!
Bulgarian Yogurt Starter Culture
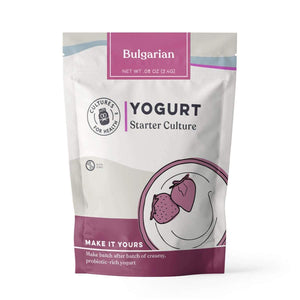
Bulgarian Yogurt Starter Culture
$14.99
Bulgarian yogurt is one of the most popular yogurt varieties - and making it at home gives you control over the ingredients, making it much healthier.
Our Bulgarian starter produces a delicious, rich and creamy homemade yogurt.
The Bulgarian culture is an heirloom culture - meaning you'll make endless delicious Bulgarian yogurt all from one starter!
INGREDIENTS:
- 1 quart Raw or pasteurized milk (avoid ultra-pasteurized)
- 1 packet Greek or Bulgarian yogurt starter
INSTRUCTIONS:
- Pour 1 quart of milk into your Instant Pot
- Turn the valve to the “pressure” setting
- Hit the “YOGURT” button until it says “BOIL." Wait until the “BOIL” cycle is complete
- Release the pressure valve (either natural or quick release is ok)
- Open the Instant Pot
- Cool your milk to 115 degrees (life hack - stir the milk with a frozen water bottle to expedite the process)
- Add 1 yogurt packet into the yogurt maker and stir thoroughly
- Hit the “YOGURT” button again until it says 8 hours, then hit the “+” button until it says “12."
- Check frequently between hours 8 & 12 by tilting the pot gently. If the yogurt moves away from the side of the pot in one mass instead of running up the side, it is finished culturing.
- Once the yogurt has set or at the end of 12 hours, cover it and allow it to cool for 2 hours at room temperature.
- After 2 hours, refrigerate the yogurt for at least 6 hours before consuming.
- If your activation batch doesn’t set in 12 hours, that’s ok! Remember to reserve 2-3 tablespoons of your runny batch to inoculate your next batch and use the rest as you’d use buttermilk - in biscuits, salad dressing, pancakes, etc.
- For successive batches, follow steps 1-11, except add 2-3 tablespoons of yogurt from your previous batch instead of a starter packet.