


While mastering the art of making yogurt cultures can be a rewarding process, you might be wondering, 'why is my yogurt watery?' You may want to enhance the texture of your homemade yogurt by making it thicker.
We want to help you make delicious and healthy yogurt perfect for your needs. Download our Yogurt Guide and Recipe book, which offers simple fixes for runny yogurt, so you can have the ideal snack every time.
KNOWING WHEN TO THICKEN YOGURT
USING RE-USABLE STARTER CULTURES
If you're making yogurt using an heirloom starter culture that requires activation, it's not uncommon for the activation batch to be somewhat liquidy and thin.
This is perfectly normal as the bacteria in the freeze-dried cultures are just waking up and getting active during the first batch. While you may be tempted to grab a thickener, remember that even if the milk is runny, it's still cultured and can be used to culture future batches.
It's during these next few batches that the texture and consistency should even out. If you'd still prefer a thicker yogurt after a few batches, then consider using one of the methods below to thicken your yogurt.
Keep in mind that thickening agents can sometimes interfere with re-culturing, so keep some extra starter yogurt on hand if you plan to experiment with different thickeners.
USING A VEGAN YOGURT STARTER CULTURE
On the other hand, if you are making yogurt using a Vegan Yogurt Starter Culture, which is a direct-set (or single-use) culture, you'll want to add a thickening agent to help it set. Several of the thickening agents below need to be added to milk before heating and culturing, so be sure to pick out a thickener before getting started. The Vegan Yogurt Starter Kit comes with a thickening agent to help you get the perfect texture.

1. EXPERIMENTING WITH YOUR STARTER OR MILK
Depending on the type of milk used and the culture chosen, yogurt can be as thin as buttermilk or as thick as sour cream. Two ways to increase the thickness of the final product are to choose a different type of milk for making yogurt or to select the best yogurt starter for your application.
To enhance the thickness of your final product, you can either choose a different type of milk or select the best yogurt starter for your application. This way, you're ensuring your homemade yogurt is thick to your liking.
2. BOOSTING THE FAT CONTENT
The fat in yogurt is part of what makes it thick, so using whole milk will result in a thicker yogurt than skim milk.
You can also add cream to the milk or use it in place of milk to increase the fat content. Heavy cream is too low in lactose to sustain an heirloom culture long-term, so be sure to refresh the starter in whole or 2% milk after 2-4 batches if you decide to use this.
3. HEATING THE MILK LONGER
When preparing the milk, heat it to 160º-180°F, and maintain the temperature for 20 to 30 minutes. Then cool to culturing temperature.
(If milk is accidentally heated to over 180°F, simply let it cool back to 180°F before maintaining the temperature.)
Heating the milk denatures the proteins, allowing them to form a stronger network when exposed to acid (like lactic acid produced by the bacteria in yogurt cultures). Thus, a higher temperature, held for a longer time, will give you a firmer yogurt.
It's important to heat the milk slowly to make a creamy yogurt. Heating the milk too quickly will create a grainy texture.
By doing so, you allow the proteins in the milk to denature, which in turn forms a stronger network when exposed to acid. This way, you can master how to make yogurt thicker.
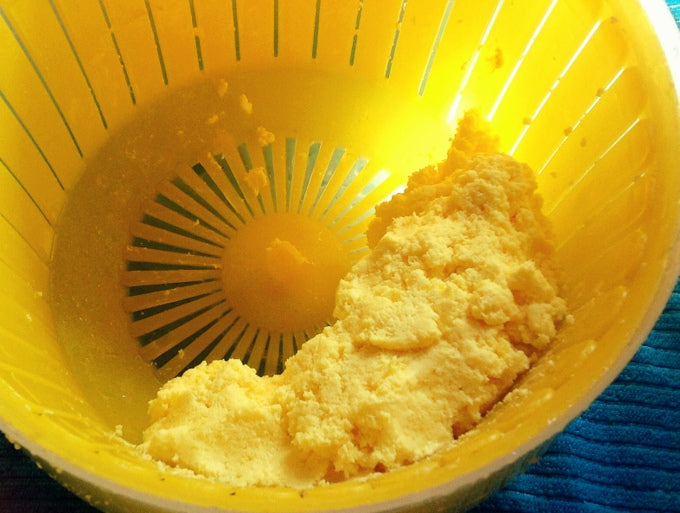
4. STRAINING THE YOGURT
Our Greek Yogurt Maker, a cotton bag or tight-weave cloth, or a piece of butter muslin are all effective tools to use for draining whey from yogurt. Doing so removes some of the water, leaving the fats and proteins behind. The longer you drain whey, the thicker your yogurt will become. (Don't toss that whey either - there are lots of ways to use whey!)
5. ADDING THICKENERS!
This is a process that is most successful with direct-set cultures, or when maintaining a separate mother culture, since the thickeners may interfere with re-culturing. Yogurt usually will not thicken until cooled, especially non-dairy yogurt. In some cases, thickening can take up to 24 hours. Even if the yogurt is thin, it is still a cultured food and may be consumed (it's great for whipping up smoothies!)
DIFFERENT YOGURT THICKENERS & HOW TO USE THEM
Milk Solids
Powdered milk solids generally come in cow, goat, and soy varieties.
When to Add: Add to milk before heating and culturing.
Instructions: For every 3-4 cups of fresh cow milk use ½-1 cup powdered milk. If using fresh goat milk or soy milk add ¼-½ cup powdered milk.
Pros: Does not require additional heating or additives. Does not introduce other ingredients.
Cons: Powdered milk is processed, which you may be choosing to avoid. This thickener is not suitable for raw yogurt.
Gelatin
When to Add: Add to milk before heating and culturing.
Instructions: For every 3-4 cups of milk, sprinkle 1 tablespoon of gelatin into 1 cup of cold milk. Gelatin must be heated to at least 95⁰F to activate. Mix well to combine. For yogurts cultured at room temperature, be sure to allow the milk to cool to the culturing temperature before adding starter culture.
Pros: Can achieve very thick, commercial-style texture. Neutral taste. Suitable for raw milk yogurt as it doesn’t need to be heated beyond the raw threshold.
Cons: Not suitable for vegetarians or vegans.
Pectin
When to Add: Prepare thickener in milk before heating and culturing.
Instructions: When making 1 quart of yogurt, pour 2 cups of milk into a blender. Add 1-2 teaspoons pectin (depending on the type of pectin), and blend until pectin is incorporated. Add to the rest of the milk and heat to 140⁰F. Cool to culturing temperature and add culture.
Keep in Mind: The quantity of pectin may need adjusting depending on the milk or pectin used. Sugar-activated pectin may require additional sugar in the milk to be effective. Calcium-activated pectin uses the calcium in the milk to set up. When using non-dairy milks, add the amount of calcium water specified by the recipe.
Pros: Best choice for vegan yogurts. Consistent results. Gives texture similar to gelatin and can be very thick.
Cons: Pomona’s is not available in all grocery stores (but you can find it here or in the Vegan Yogurt Starter Kit). Not suitable for those with a citrus allergy. Standard (sugar-set) pectin has a large impact on the flavor of the yogurt and requires large amounts of sugar. Not suitable for making raw yogurt.
Agar
When to Add: Add to milk before heating and culturing.
Instructions: For every 3-4 cups of milk, dissolve ½ teaspoon powdered agar into the milk. Heat to 190⁰F and hold for 10 minutes. Cool to culturing temperature and add culture.
Pros: Low allergen and good vegan option.
Cons: Texture may be inconsistent. Requires longer heating period to work properly. Not suitable for making raw yogurt.
Guar Gum
When to Add: Add to milk before culturing or to yogurt after it's cultured.
Instructions: For every 3-4 cups of milk, add 1 teaspoon guar gum to cold milk before heating and culturing. (You can also add it to milk after heating, but milk should be cooled first.) Or, add 1 teaspoon guar gum per 3-4 cups of cultured yogurt.
Pros: Can be added after the yogurt is cultured. Does not require heating to work, so it is suitable for making raw yogurt.
Cons: Texture is not as smooth as other methods. Requires thorough blending to avoid lumps.
Tapioca Starch
When to Add: Add to milk before heating and culturing.
Instructions: For 3-4 cups of milk, dissolve 2 tablespoons of tapioca starch into the milk and heat to 140⁰F. Cool to culturing temperature and add culture.
Pros: Easier to find than some products. Good option for vegans.
Cons: Can be very inconsistent. If overheated, it will fail, but it must reach at least 140⁰F to work.
Arrowroot Starch
When to Add: Add to milk before heating and culturing.
Instructions: For 3-4 cups of non-dairy milk, dissolve 1½-2 tablespoons of arrowroot starch into the milk and heat to 140⁰F. Cool to culturing temperature and add culture.
Pros: Good option for non-dairy milks.
Cons: Not recommended for use with dairy milks.
Ultra-Gel (modified corn starch)
When to Add: Add to cooled milk after heating milk and before culturing.
While regular corn starch can be used, it is not particularly stable and can yield an odd consistency.
Instructions: For 3-4 cups milk, add ¼ cup Ultra-gel to the milk after is has been heated and cooled. Mix well to combine.
Pros: Does not appear to require heat to work. Easy to find. Gives consistent results.
Cons: Highly processed.
HOW NOT TO THICKEN YOGURT
It may be tempting to add more cultures to the yogurt in an attempt to increase the probiotic content, but this is rarely successful.
Yogurt cultures are carefully balanced so that the strains work together to give a particular result in terms of taste and consistency. Adding additional strains can weaken or even kill off the yogurt cultures, and may even produce something that is harmful to eat.
So, when working with yogurt starter cultures, try one of the methods above to thicken your homemade yogurt to your liking.
START MAKING HOMEMADE YOGURT WITH CULTURES FOR HEALTH
Culturing your own yogurt is an amazing way to make amazing yogurt at home without all of the unnatural ingredients so many companies use in pre-made yogurts. Everyone loves yogurt fresh from culturing but sometimes storing it correctly and making sure it keeps its consistency can be a struggle. Luckily - we just went through exactly how to thicken yogurt and how not to thicken the yogurt.
With all that in mind, I think it's time you get back to making your own yogurt. If you haven't started, now is a perfect time and Cultures for Health is here to help!
We take all of the guesswork out of fermentation with our amazing all-in-one fermentation kits that include everything you need to make your own food at home.
Are you a veteran of the fermentation game? Well, we've got you covered too with our amazing yogurt starter packs and a wide array of tools for you to add to your fermentation kitchen.
Click here to check out our Vegan Yogurt Starter kit and get to making your own homemade yogurt now!
Are you looking for a delicious and healthy snack that is easy to make? Download our Yogurt Guide and Recipe Book today to get started!


