


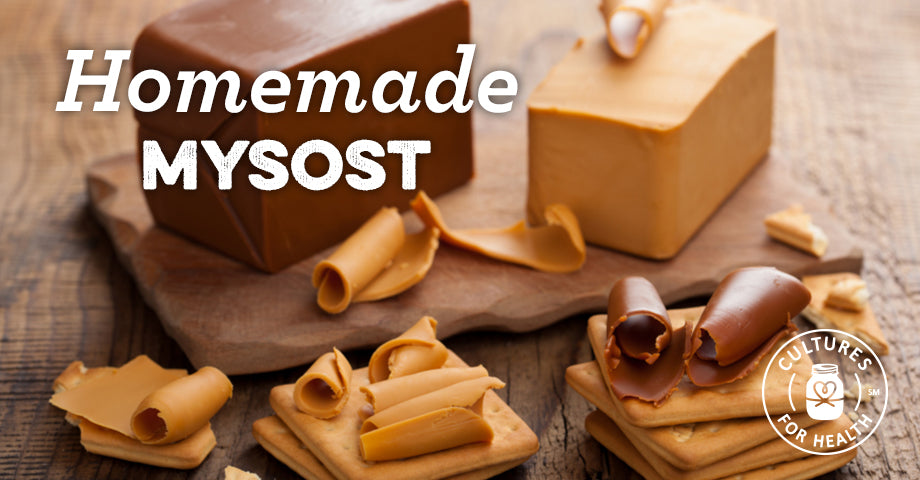
This cheese is Scandinavian in origin and traditionally made from the whey of cow milk. The color of this cheese is usually light to dark brown, depending on the amount of cream that has been added and the sugar caramelization levels. If you would like a more spreadable cheese, you can decrease the boiling time, or cook it more for a thicker, sliceable cheese. This cheese must be boiled for several hours, so this would be a good project to make on a woodstove.
5 minutes
35 minutes
2
INGREDIENTS AND EQUIPMENT AVAILABLE AT CULTURES FOR HEALTH
Fresh Cheese Making Kit

Fresh Cheese Making Kit
$45.99
Our most comprehensive choice, the Fresh Cheese Kit makes five varieties of soft cheese: feta, cottage cheese, cream cheese, fromage blanc, and traditional quark.
Packaging and Equipment in the kit may appear different than pictured.
INGREDIENTS:
- Fresh whey from making a 2 gallon recipe of cow milk cheese
- 2 cups cream, if desired for a sweeter cheese
INSTRUCTIONS:
- Put the whey into a clean cheese pot and bring it to a rapid boil, keeping an eye on it carefully. Foam will soon begin to form on the top of the whey, and must be skimmed off with your cheese spoon to keep the whey from boiling over. Put the foam in a bowl in the refrigerator.
- Let the whey to continue to boil slowly (turn the temperature down) uncovered for several hours, or until the volume has reduced by 75%. (Only 25% of the liquid will remain.) This can take 5 to 15 hours. Keep stirring pretty regularly throughout to keep it from sticking.
- Add the chilled, reserved foam to the reduced whey in the pot. The whey will begin to thicken at this point, and this is when you will add the cream if you have decided use it.
- After you have added or not added the cream, pour the hot whey into a blender and hold the lid down with a potholder, taking great care not to burn yourself with the hot whey. Blend the whey at medium speed for 1 minute in the blender, or until it is smooth and creamy.
- Prepare a sink or small tub by half filling with cold water.
- Pour the whey mixture back into the pot and cook over low heat, continuing to stir. The cheese will continue to thicken. When the thickness begins to resemble fudge, take the pot off the stove and put it into the sink or tub. Begin stirring continuously until the cheese has cooled enough for you to pour it into the molds. (These can be specialized rectangular molds or just a muffin pan, lightly greased with butter.)
- Once the cheese has cooled, take them out of the molds and wrap and store in the refrigerator.
The cheese will keep for up to 4 weeks in cold storage, or you can freeze it for up to 6 months.