


Venturing into the world of pressed cheeses is an exciting and new adventure! Once you’ve mastered the simpler cheeses, pressed cheeses, like cheddar, can be next on your list of cheeses to make.
If you’re going to be making a lot of cheese in the future, then purchasing a cheese press might be a good investment. It will allow you to easily press cheeses for years to come. But cheese presses can be very expensive. If you’re only making one cheese, and not sure whether you want to make the investment, you can try pressing cheeses without having to shell out a lot of money. Making your own cheese press with materials you already have on hand is a good way to become acquainted with cheese pressing.
WHAT IS A CHEESE PRESS USED FOR?
The basic concept of the cheese press is a piece of equipment made to apply pressure and weight to cheese curds in order to force the cheese to exude liquid whey. As the whey is forced from the cheese, the curds come together to form a solid cheese that can then be aged and stored for some time.
There are many ways of doing this, starting with the elaborate and moving onto the very simple. The more elaborate varieties of homemade cheese presses involve springs and sheets of metal, specific lumber, and nails and screws. These types of cheese presses mimic many of the cheese presses available commercially.
The type of cheese press presented here is the very simple cheese press that you can make at home, with materials you might already have in your kitchen. You can use it for lightly pressed cheeses that do not require extreme weights.

SUPPLIES YOU WILL NEED FOR A SIMPLE CHEESE PRESS
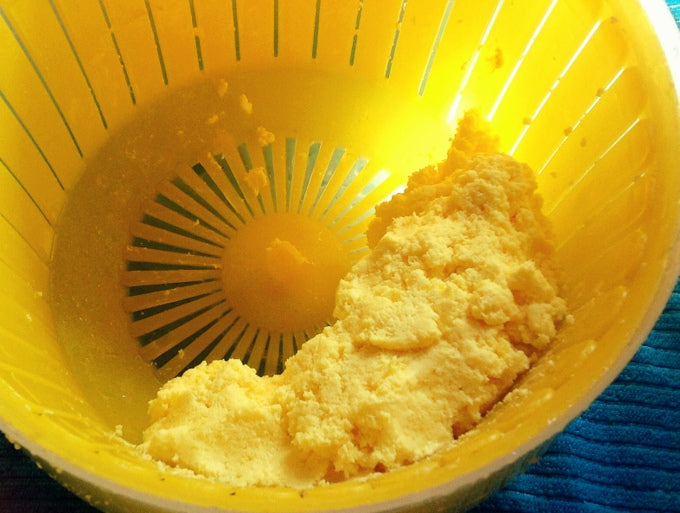
- A cheese mold. These are usually plastic and contain many small holes that allow the whey to escape.
- A pressing plate. This will go atop the cheese in the mold.
- A vessel that will fit just inside the opening of the cheese mold, above the pressing plate. The size vessel you need will depend on the shape of your mold. A large mason jar works well in many cases.
- Something for the mold to sit atop as the whey drains out, along with a place to catch the whey. This could be a matter of placing the mold atop a cooling rack with a vessel underneath to catch the whey.
- A cutting board, cookie sheet, or other thin and long weight-bearing piece of material. This will go between the mold and the weight you will be pressing the cheese with.
- Heavy objects that aren’t too awkward to stack atop your cheese. Some good options are sacks of flour, jars of heavy dried goods, free weights, and cookbooks. None of these will come in contact with the cheese or whey. Some recipes will call for specific weights at specific times during the pressing process. Because of this, it is good to know approximately how heavy the objects are that you are using as weights. Either weigh these objects or use sacks of flour or weights in which the weight is already given to you.
HOW TO PUT A SIMPLE CHEESE PRESS TOGETHER

|
Place a large bowl or bucket underneath a cooling rack that will fit securely across the top of the bowl or bucket. |
 |
Place the cheese mold on top of the drying rack and fill with the cheese curds you wish to press. |
 |
Place the pressing plate atop the cheese curds and put the jar on top of that. Across the top of the jar place a cutting board or similar device that will bear weight evenly, without falling. |
 |
Top with weights, according to your cheese recipe, and follow your recipe for any change in weight or flipping of cheese. |
HOW TO FIGURE OUT WEIGHTS FOR A HOMEMADE CHEESE PRESS
Cheese pressing weights are figured in pounds of pressure, not direct weight. So if you have a block of cheese that is 5 by 5 inches (25 square inches), and you put a 10-pound weight on it, each square inch will be getting 1/25 of the 10 pounds. However, if your cheese block is 3 by 3 inches (9 square inches), you’d get 1/9 of the 10-pound weight pressing on each square inch of cheese, so there would be more pressure.
To figure out how much weight to put on your cheese, first measure the block of cheese you’ll be pressing. If it is a square or rectangular block, just multiply the length times the width. That gives you the number of square inches. Then multiply the pressing weight (as indicated by the recipe) by the number of square inches of the cheese to get the amount of weight you will need to put on the press.
An Example: Say you are using a mold that is 3 inches by 4 inches. That is 12 square inches. If your recipe calls for 5 pounds of pressure, multiply 12 by 5 to determine that you need to pile 60 pounds of weight onto the press.
For circular molds, you can get an approximate number of square inches by using the formula for the area of a circle: ∏r² (that is, pi times the radius squared). Too complicated? Just take 1/2 the diameter of the circle, multiply it times itself, then multiply that by 3. So a 4-inch round would give you 2x2x3, or 12 square inches. For 5 pounds of pressure, you would need 60 pounds of weight.
Obviously, a makeshift press is really only adequate for low-pressure situations. If you get much over 10 pounds of pressure, you will need some substantially heavy weights, which will be hard to accumulate, and hard to pile onto the press without risking damage to the press or your countertop.
WHAT KIND OF CHEESE PRESS DO YOU NEED?
This cheese press isn’t nearly as fancy as the ones you can spend the big bucks on, but it will get you started and introduce you to the world of pressed cheeses. You might find that it works perfectly well for your needs, and prevents you from spending money on something you don’t really need.
If you want to move on to harder cheeses (and thus greater weights), you might like to try your hand at building a spring-loaded press. You can find many tutorials for making them on the internet or at your public library.
And of course, for a reliable and professional type press, you can purchase one ready-made. While they are somewhat pricey, if you are going to making a lot of cheese and different varieties, you may find that the investment is worth it.


