


This is a method a friend of mine and I developed at our bakery. It took a lot of trial and error, but over time we developed a process that both took the strain off of our bodies and yielded some professional-quality artisan bread. This method is an adaptation on the folding method that has been used by several professional bakeries, with our own unique twists.
While finding this method was critical for us to be able to meet the volume of bread demanded in a commercial bakery, I have found it is also an excellent method for small-batch home baking as it separates the process into short steps stretched over a few days. With this method, you’ll only need to devote a few hours at a time to your baking instead of setting aside a whole day for it.
The nature of the fermentation in this method also gives the baker a fair amount of control over the sourness of the final product and also provides some tolerance for improper hydration. In principle, this method employs bulk fermentation to do most of the work for the baker by developing the gluten slowly and allowing the dough to aerate naturally. On our best days, this method produced superb loaves of bread on a wide variety of flours and grains.

One important consideration in this method is the uniqueness of each individual starter. Based on the type of flour, the age, and the hydration of a starter, there may be some variance in the process concerning the length of the bulk fermentation period as well as the initial hydration of the dough. This process was developed around a well-established starter feeding only on white flour and water. However, by using the starter to build a leaven (step 1 in my next blog post) there remains a fair amount of play for experimenting with different flour combinations even before being introduced into a recipe. Building a leaven is a great way to experiment with different flours without risking harm to your starter. In fact, it is possible to build a leaven and keep a portion of it as another starter, which I have done successfully.
Always remember: sourdough baking is just as much (if not more so) an art as a science. There are no failures, no wrong approaches. To paraphrase Martin Luther, do not be afraid to “sin boldly”. Some of our finest loaves arose out of what we perceived as monumental errors. Good luck, and happy baking!
Building a Leaven
A “leaven” is a combination of flour and water that has been inoculated with a portion of a sourdough starter. In our bakery, building a leaven to mix with was crucial to avoid putting stress on the starter by using and feeding it in mass quantities. A leaven essentially acts as a medium between the bacteria in your starter and your bread dough that allows you to use smaller amounts of starter to achieve the same result. The leaven will be built the night before you intend to mix, and two days or more before you intend to bake, so plan accordingly.
A typical leaven recipe follows: *mix in a glass bowl*
- 1 part water (room temperature or slightly cooler)
- 1 part flour (I prefer a half whole wheat/half white flour mix)
- 1 ounce starter/pound of dough (flexible)
While measuring these parts by weight is the easiest and most accurate method, it can be accomplished using measuring cups. Just be sure use the same vessel for both the flour and the water. For two 2lb. loaves, you would use 4 oz. of starter (1 oz./lb). This is ultimately a rough approximation as every starter behaves differently. It may take some trial and error to find what amount of your starter is enough.
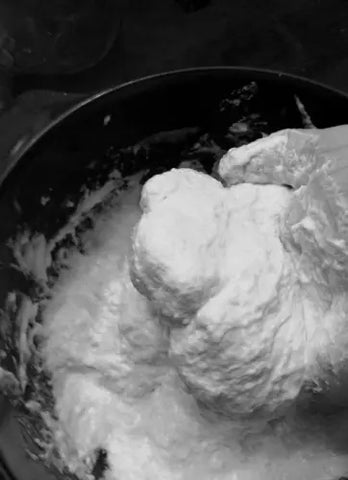
You want to achieve a fairly wet consistency – wetter than you would use for a bread dough. It should be runny enough to pour out of the vessel, if you wanted to, but sticky enough to where it clings to your hand and the side of the bowl. Mix by hand until completely incorporated. Cover with cling-wrap or a lid and leave to ferment between 12-15 hours at room temperature (65-75 degrees).

If you are making a small batch of just one or two loaves and do not want to be bothered by making a leaven, it is perfectly fine to use your starter directly. However, be aware that using your starter will cause your bulk fermentation to speed up. Just be sure to feed your starter approximately 4-5 hours before mixing your dough.
Leaven Testing and Mixing
The best test for determining whether or not your leaven is ready to mix with is what is known as the “float” test. It’s pretty simple: take a fist full of leaven and place it in a bowl of water. If it floats, the leaven has enough aeration and bacterial activity to put levity into your bread. If your leaven sinks, put it back in the bowl and place in a warm spot for another hour or so. After 12 hours, your leaven will almost always be ready to go; however, during colder seasons it may take up to 15 hours. One way around this time difference is to build your leaven with slightly warmer (never hot!) water. This will speed along the fermentation.
Once your leaven is ready, commence mixing the dough for your recipe. As far as ratios are concerned, your amount of leaven (by weight) should be approximately 20% of the weight of flour called for by your recipe. For example, if your recipe calls for 100g of flour, you will want to add 20g of your leaven. Bakers will commonly write recipes that deal in ratios that are proportionate to the total amount of flour. So when a baker talks about a dough that is roughly “70% hydrated”, They mean that for every 100g of flour, there is 70g of water. A typical formula for sourdough recipes is as follows:
- 100g Flour
- 65-70g Water
- 20g Leaven
- 2g Salt
Naturally, the type of flour(s), the addition of whole or ground grains, or the addition of honey to the recipe will have an effect on the recommended hydration percentage. Whole wheat flour and whole grains will tend to absorb water as the dough rests. Dough with lots of grains or a high percentage of whole wheat often feel extremely wet at the start but dry up as they proof and undergo folding. Dough with honey will require slightly less water. As stated in the beginning, this is just a guideline. All of these proportions can be manipulated to suit your tastes (especially the salt percentage).
For mixing, I have found it easiest to mix by hand and follow a certain order for adding your ingredients. In a glass bowl, start by adding your water. For a shorter proofing period or for mixing in a cold environment, use water slightly warmer than room temperature (lukewarm) but never hot! In warmer areas, you may want to use water that is slightly cooler than room temperature, but not too cold to the point where it’s uncomfortable to keep your hand in the water. Next, add your leaven and break it apart with your fingers until it’s somewhat dispersed and the water appears cloudy. Add your honey at this point, if the recipe calls for it. Next, add your flours. You may start by adding half and work in the rest slowly, or you can go all at once. It depends on how wet your dough is (and on how strong your hands are). DO NOT add your salt yet. Mix by squishing the ingredients between your fingers until all the ingredients just barely come together to form a uniform texture.

Salting
Let the dough rest for half an hour in a warm place uncovered. By withholding the salt, you are giving your leaven or your starter a chance to inoculate your dough uninhibited. It’s like calling your teenage kids on a Friday night half an hour before you’ll be home – it gives them a chance to get their act together. This period is commonly referred to by bakers as the “autolyse period”. After half an hour, you are ready to add your salt. Do this by placing your salt in a small dish and adding just enough water to dissolve your salt into a thick solution. Dissolving the salt in water makes it easier to incorporate it evenly into your dough. Spread the salt evenly across the surface of the dough, wet your hands and scrunch dough together with both of your hands aggressively (like a cat sharpening its claws on the carpet). Keep scrunching until you feel the salt has been as incorporated as possible.


Folding
Once your salt is incorporated, you will need to fold the dough before letting it rest. Fold the dough in on itself in four motions. Picture the dough as having four corners. Grab underneath of one corner and fold the point to the center of the dough. Repeat this for the other three corners. You should be left with a tight ball of dough in the bowl. Let the dough rest for another half an hour, and fold it again. Repeat this resting and folding 2-3 more times until the dough feels stretchy and tight. If by fold #4 the dough still isn’t quite holding together, the hydration was probably a little too high. Simply give it an additional fold or two and it should start coming together.
This whole process should take around 2 – 2.5 hours between the mixing, salting, and folding/resting. Once finished with the last fold, cover dough with cling wrap or a lid (if using a lid, rub or spray the underside with a little olive or canola oil – you’ll thank yourself later). Let dough proof in container at room temperature for the first 12-15 hours of its life. After 12 hours, the dough is ready to be baked if you so choose. Otherwise, if you desire more sourness and depth of flavor, you can move your dough into the refrigerator for a cool bulk ferment. Depending on how active your dough is, you can keep your dough in this cool bulk ferment stage for a few days, and perhaps up to three or four! A two day (40-48 hour) cool bulk fermentation period is ideal. After day 3 and 4, the dough starts to fall apart as the gluten breaks down; however, on rare occasion I have baked a dough I had forgotten in the fridge and it sometimes turns out beautifully. I like to experiment by making enough dough for 4-5 loaves and taking a portion out of the refrigerator each day to see how the quality improves or declines with a longer cool bulk fermentation. The choice is yours!

Stay tuned for Pt. 2: Artisan Bread: Shaping, Scoring, and Baking.


